

How Much Latitude Does The Human Eye Have Compared To A Camera
The more fourth dimension I spend in my photography pursuits, the more I appreciate cameras that capture and photos that exploit their maximum dynamic range potential. Digital cameras have undergone dramatic improvements over the terminal 12+ years, but they withal don't come close to the human centre's dynamic range capabilities. By some estimates, the human eye tin distinguish up to 24 f-stops of dynamic range. College end DSLRs such as the Nikon D800 by comparison, can capture up to a theoretical max of 14.4 f-stops of dynamic range. The usable dynamic range of most DSLRs, however, is closer to 5-nine f-stops, considering the touch on of noise, which tin return some of the DSLRs' f-stop range impractical to exploit. Thus your eyes – at least for now – are however far more capable than the best DSLR relative to recognizing various tonal gradations. As I volition demonstrate via my new model, "Doris" (shown beneath) of the Pittsburgh Zoo, even photos taken with high quality DSLRs sometimes demand a bit of extra processing to match what your optics can see. The photo beneath is the result of a processing technique I often employ to heave dynamic range when it is apparent that my camera's sensor failed to capture what I remember seeing.
1) Good Dynamic Range Starts With A Good Camera
The first stride in maximizing dynamic range is to have a photographic camera that scores high in this category. DXO Marking can provide a practiced understanding of how DSLRs stack up against each other in this regard. The results from the D800 dynamic range testing have been amazing, clearly showing that it has the capacity to pull significant shadow detail while still keeping racket levels relatively depression. If and when I actually become my hands on a D800, I will be able to decide this for myself! For this tutorial, I used my trusty Nikon D7000, which despite its small-scale price, has a very good dynamic range score.
Simply even with a D800 or other DSLR that excels in the dynamic range category, your photos are nonetheless likely going to demand some additional processing to maximize their potential. For extreme lighting weather, the but way to capture the total spectrum of exposures is with exposure bracketing and combining multiple images every bit done with high dynamic range software. In less dramatic lighting conditions, however, yous may just need to change your exposure values using copies of a unmarried image and combine them to create the optimal exposure for each part of your image. This need not be very cumbersome or time consuming, since with a bit of experimentation, you tin rapidly spot opportunities to enhance your photos' dynamic range and make the necessary postal service processing modifications using Lightroom, Photoshop, and other software.
2) Diverseness Of Techniques
I chose to exercise near of my processing using Lightroom and Photoshop, my main tools along with the full plug-in suite from NIK Software. I have no doubt that I could have used a diversity of other photography processing software and techniques to achieve like results.
3) Assessment Of Lighting Atmospheric condition
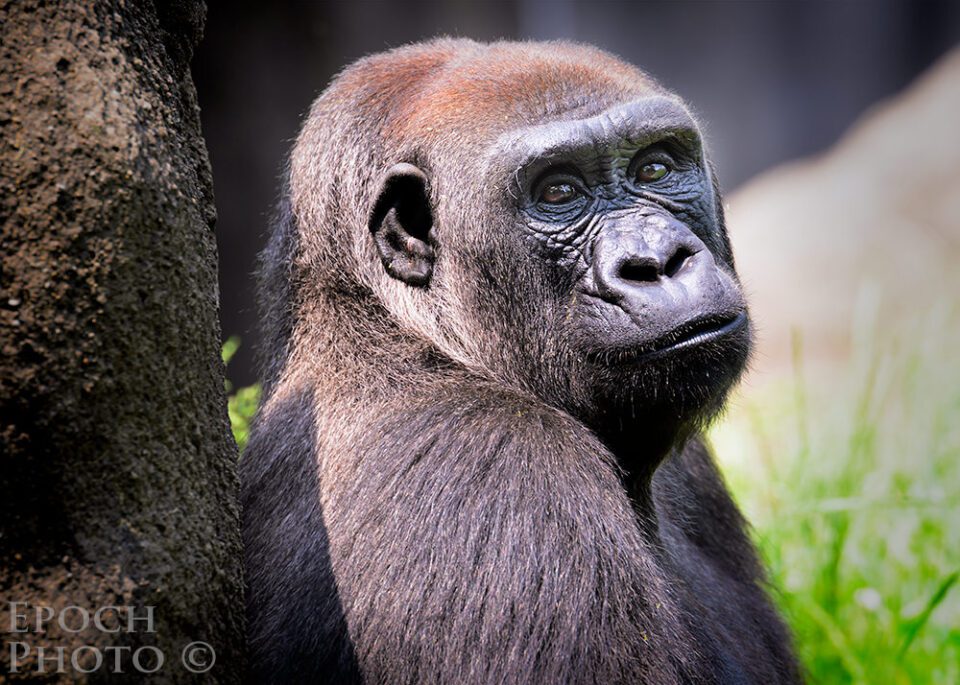
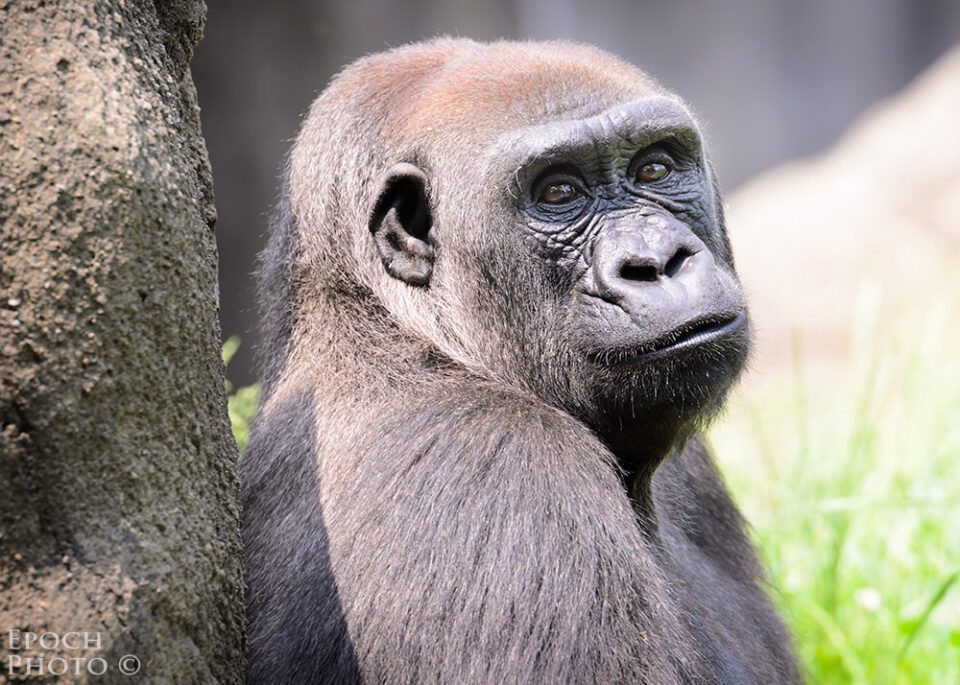
I knew this photo and lighting were going to cause an result for my D7000, despite its respectable 13.9 DxO Mark dynamic range score. It was just shy of ane:00 PM on Sunday on Memorial Day weekend, and the dominicus was high and vivid. I was taking a photo of my new model, Doris, who had ditched her fellow Pittsburgh Zoo gorillas and for some reason made her mode over toward me in a little-visited portion of the park, where we were piffling more than than 35 feet autonomously. She looked at me rather quizzically, decided I seemed harmless enough, sabbatum down with her back upwardly against a stone post, and proceeded to pose to me – or then I imagined…
Given the D7000'due south tendency to overexpose a bit and the fact that Doris was a mixture of dark gray and blackness, I idea information technology wise to dial-in an exposure bounty of -.3. Even though I could meet Doris' beautiful dark-brown eyes very conspicuously through my Nikon 70-200mm VR II and Nikon i.4X teleconverter, I knew the camera' sensor was not going to be able to accurately return the diverse tonal range, and that upon returning abode, I was going to take some piece of work to do in order to represent the dynamic range that my eyes saw. The picture below is the RAW file as it was brought into Lightroom 4.0 without any adjustments. As you can see, the D7000 did a respectable chore, especially with Doris' silky fur coat, but her optics are barely visible. And as with most RAW files, the image was pretty banal and boring.
four) Car Adjustment In Lightroom iv
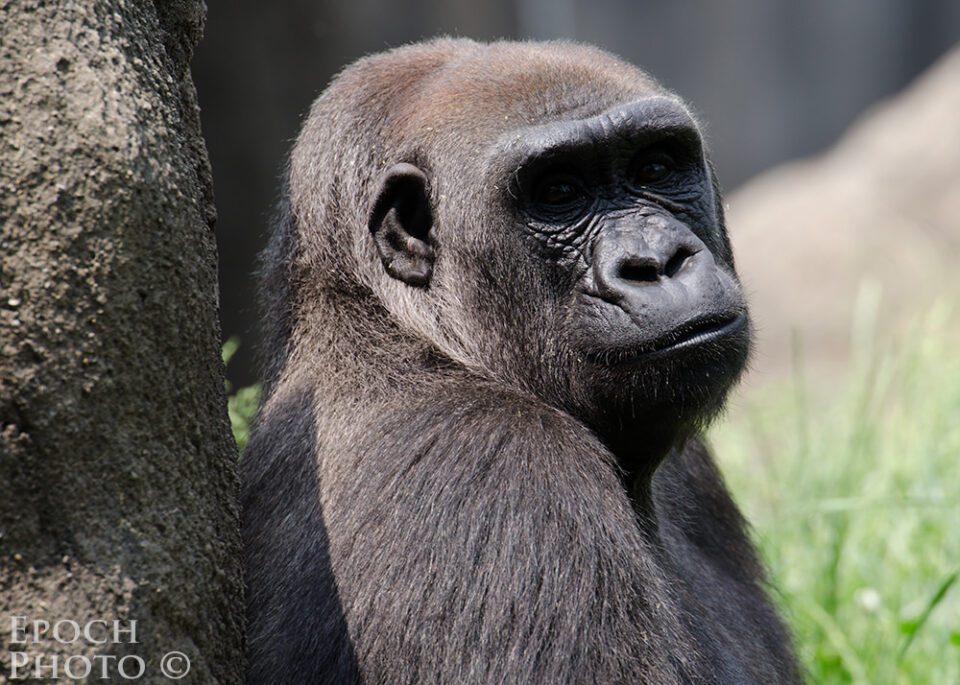
Based on my D7000'southward characteristics and my understanding of the elements of a "proficient" photo, I created a number of Lightroom presets I apply to my photos that accost exposure, contrast, shadows, color, contrast, highlights, sharpening, lens adjustments, etc. I nearly always utilize a single preset that gets me 85-90% of what I expect a photo to be. The rest of my adjustments are made in Photoshop. After I applied a preset which I ingeniously named, "D7000 Preset", which as well included the use of Auto Tone, Lightroom 4 produced the image beneath. This preset improved the dark shadows associated with Doris'south pretty brown optics and other body parts, but made her glaze a bit too light. Admittedly, this is tricky prototype to go right with the Car Tone aligning feature. Lightroom 4'southward "Shadows" control is a huge improvement over Lightroom three's "Fill Light" adequacy, equally it has the ability to heave the exposure of the shadow regions without negatively impacting the residue of the photograph. Fill Light oft had the tendency to rapidly "wash out" a photograph and make it await as if a thin coat of gray paint had been dumped on it. Lightroom 4'southward Shadows eliminates the unwanted color cast by just impacting those areas that are truly shadow areas, and represents a huge leap forrad. Lightroom 4's Auto Tone feature has also improved quite a flake over that of Lightroom iii. Lightroom 3's Auto Tone push button would near always overexpose my photos, to the point where I stopped using information technology altogether. In contrast, Lightroom 4's Auto Tone does a much better job, producing much more realistic mid-tones and blacks. But as proficient as both the Automobile Tone and Shadows features are in Lightroom iv, you tin can run into that Doris still needed some work. Her beautiful eyes simply weren't showing their sparkle as of notwithstanding!
v) Boosting Exposure In Lightroom four
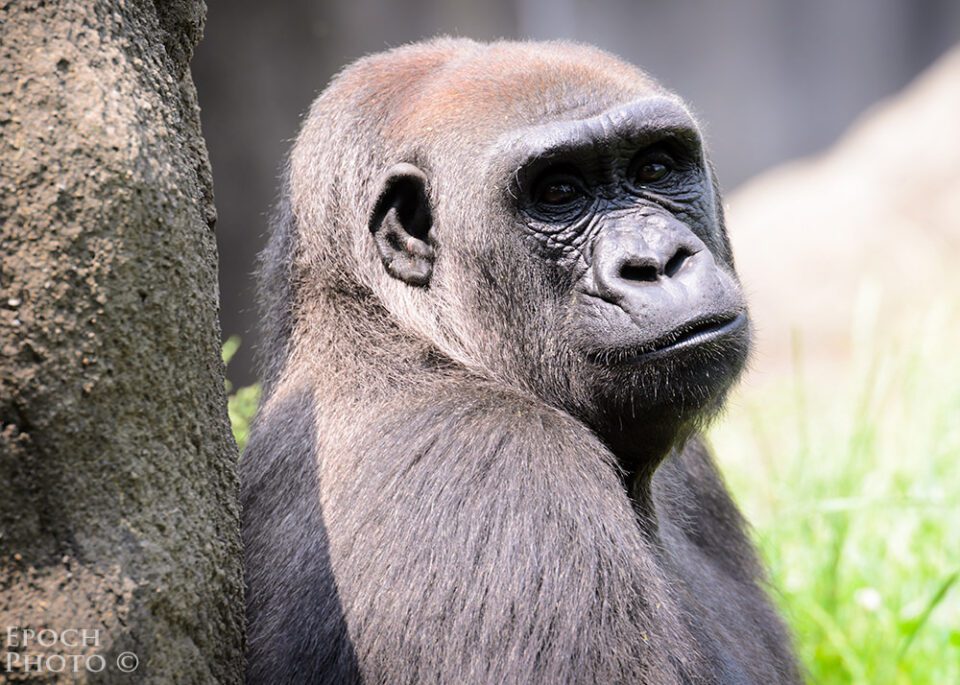
The side by side experiment I performed was to heave the Exposure setting of a copy of this photograph in Lightroom to see how much I could improve the shadow regions of Doris' eyes beyond what the Shadow feature would permit. As you lot can see, my D7000 captured quite a bit more details and dynamic range than either the RAW or adapted Lightroom iv file suggested. And since I shot at ISO 100, I had a scrap more latitude of "usable" dynamic range to play with, since RAW files shot at lower ISOs are non affected as much by noise as photos shot at higher ISOs. Had I taken this photograph of Doris at 3200 ISO, I doubt that could accept fabricated the corresponding adjustments shown hither without significantly boosting the dissonance levels of the shadows, and thus reducing the overall quality of the photograph. And so while the rest of the photos looked terribly overexposed, Doris' eyes were clearly brighter and showing much more detail, color, and dissimilarity than the other versions. Now you can begin to sense why the male person gorillas of the Pittsburg Zoo cook nether her gaze!
half-dozen) Combining The Exposures
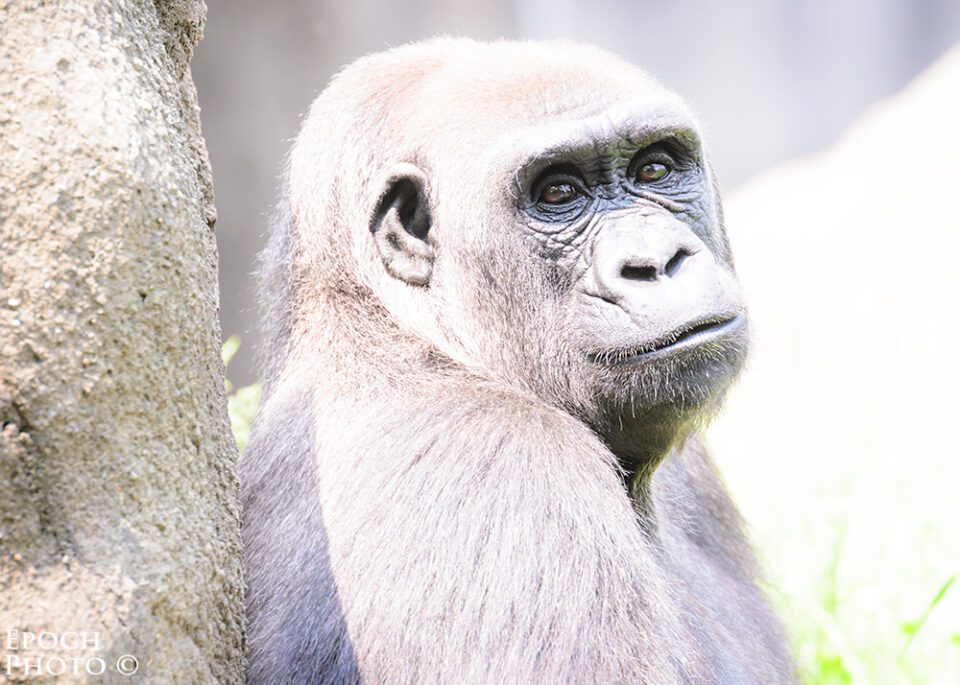
As I mentioned, there are probably a variety of ways I could have achieved a similar result, merely since I am very comfortable and familiar with Photoshop (I used version vi), I decided to bring in the original Lightroom photograph into Photoshop, and then add together the overexposed copy every bit a layer. Using layers, masks, and brush tool, I then combined the best of both photos, the results of which are much closer to what my eyes saw through the viewfinder. Not bad, simply I idea Doris had a bit more potential.
seven) Terminal Modifications
The last steps involved adjusting exposure, contrast dissonance reduction, sharpening, and colour vibrance. In order to put more than of the focus on Doris' beautiful face and soulful eyes, I added a vignette using a Levels adjustment layer to darken the surrounding areas. Photo processing techniques, much like photos, are very subjective. The RAW file processing you come across hither produced something that is appealing and pleasant to my optics. Your technique and preferences might take you down some other path and issue in an image that looks different than mine. Doris happened to like this motion picture so much, notwithstanding, she made it her facebook profile photograph. She tells me that she now receives dozens of messages each twenty-four hours from male person gorillas around the world, likewise as female person gorillas seeking to understand how they tin achieve a similar look! :)
8) Summary
Maximizing the dynamic range in your photos starts with a DSLR that scores well in this category. And armed with some post-processing knowledge and experimentation, you can go a long way toward exploiting your photographs' potential.
Source: https://photographylife.com/maximizing-dynamic-range
Posted by: smithglight.blogspot.com
0 Response to "How Much Latitude Does The Human Eye Have Compared To A Camera"
Post a Comment